Tesla Model 3: HV Header - Inverter - Rear Drive Unit - Install
Install
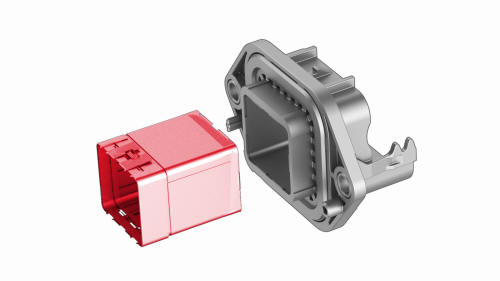
- Install a new retainer into the header, and then fasten the clips (x6) that attach the retainer to the header.

- Install the HV header onto the inverter.
Note: Push, pull, and push on the header to make sure it is fully seated.

- Install the new bolts (x2) that attach the HV header
to the inverter.
.png) Torque 6 Nm
Torque 6 Nm
- Perform an inverter air leak test. See Inverter Air Leak Test.
- Fully raise the handle on the rear drive unit HV electrical harness.
.png)
- Attach the HV connector lever lock onto the back of the HV electrical harness.
- Firmly connect the HV electrical harness to the inverter connector.
Caution: Make sure that the harness fits the connector squarely and tightly.
- While pressing the harness to the connector, remove the HV connector lever lock.
.png)
- While pressing the harness to the connector, fully lower the handle.
.png)
- Slide the release to lock the HV electrical harness.
.png)
- Install the bolt that attaches the HV electrical
harness to the inverter.
.png) Torque 6 Nm
Torque 6 Nm
.jpg)
- Fasten the clip that attaches the low voltage electrical harness to the inverter.
.png)
- Connect the low voltage electrical harness to the inverter connector.
.jpg)
- Fasten the clip that attaches the rear drive unit inlet hose to the rear drive unit inverter.
- Remove the mid aero shield panel. See Panel - Aero Shield - Mid (Remove and Replace).
- Perform a penthouse air leak test. See Penthouse Air Leak Test.
- Connect 12V power. See 12V Power (Disconnect and Connect).
READ NEXT:
 Inverter Air Leak Test
DRAFT
Warning: This procedure was derived from pre-production computer
models, and might not reflect the real-world situation. Warnings
and cautio
Inverter Coolant Leak Test
DRAFT
Warning:
This procedure was derived from pre-production computer
models, and might not reflect the real-world situation. Warnings
and cautions might be mis
SEE MORE:
Switch - Window - Rear (Remove and Replace)
Remove
Remove the LH rear door trim panel. See
Panel - Door Trim - Rear - LH (Remove and Install).
Release the clips that attach the rear window switch to the door trim
panel.
Tip: Release the front clips first, and then release the rear clips while
pushing the rear window swi
Forward Facing (Target Calibration)
SPECIAL TOOLS
Camera Calibration Target (1053066-00-A)
Wrench, 2.5mm, Thin (1448868-00-A)
Note: This procedure describes how to calibrate the forward
facing cameras. It does not apply to the rear facing camera.
Setup
Park the vehicle on a flat surface with at least 106 cm (3.5 ft) of
space in
