Tesla Model 3: Headlight - LH- Remove
Tesla Model 3 2017-2025 Service Manual / Electrical / Exterior Lights / Headlight - LH (Remove and Replace) / Headlight - LH- Remove
.jpg)
It is recommended that the vehicle be powered down before executing headlight replacement to ensure that the new headlights are recognized during vehicle firmware update.
Remove
- Raise and support the vehicle. See Raise Vehicle - 2 Post Lift.
- Remove the rear underhood apron. See Underhood Apron - Rear (Remove and Replace).
- Remove the cabin intake duct. See Duct - Cabin Intake (Remove and Replace).
- Remove the hood latch cover. See Cover - Hood Latch (Remove and Replace).
- Remove the underhood storage unit. See Underhood Storage Unit (Remove and Replace).
- Remove the front fascia. See Fascia - Front (Remove and Install).
.jpg)
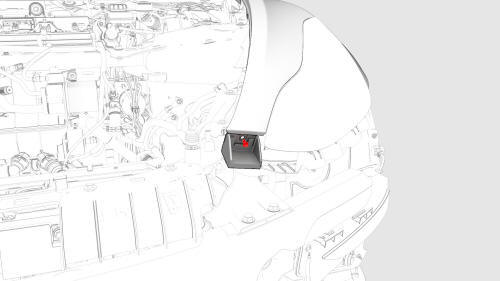
- Disconnect the electrical connector from the LH headlight.
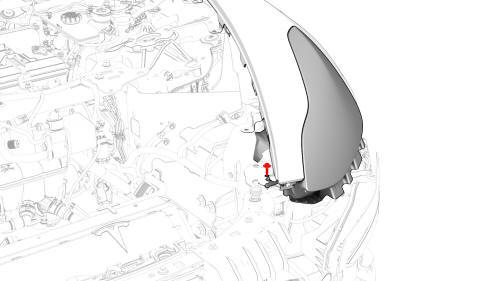
- Remove the bolt that attaches the fender bracket to the body, and then remove the bracket from the vehicle.
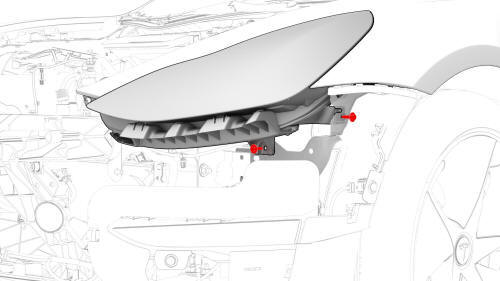
- Remove the fastener(s) that attach the LH headlight to the body, and then remove the headlight from the vehicle.
Note: The headlight might not be equipped with a lower fastener.
READ NEXT:
 Headlight - LH- Install
Install
Install the LH headlight to the vehicle.
Caution: Do not damage the headlight during installation.
Install the fastener(s) that attach the LH headlight to the body.
Torque 5
Light - Brake - High Mounted (Remove and Replace)
Remove
Remove the LH 2nd row seat side bolster. See Bolster - Side - Seat - 2nd
Row - LH (Remove and Replace).
Remove the LH side rail trim. See Trim - Side Rail - LH (Remove and
Install).
R
SEE MORE:
Smart Summon
Smart Summon (if equipped) is designed to
allow you to move Model 3 to your location
(using your phone's GPS as a target
destination) or to a location of your choice,
maneuvering around and stopping for objects
as necessary. Smart Summon works with the
Tesla mobile app when your phone is l
Heater - PTC- Install
Install
Install the sealing plate onto the new PTC heater.
Note: Failure to transfer the sealing plate has the potential of
introducing air or water leakage.
Slide the PTC heater into the HVAC assembly, and then push the PTC
heater up to install it.
Install the bolts that attach the RH
© 2019-2025 Copyright www.tmodel3.com
