Tesla Model 3: Headlight - LH (Remove and Replace)
It is recommended that the vehicle be powered down before executing headlight
replacement to ensure that the new headlights are recognized during vehicle
firmware update. Remove
Note: The headlight might not be equipped with a lower fastener. Install Caution: Do not damage the headlight during installation.
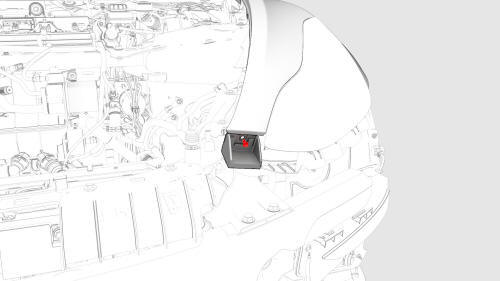
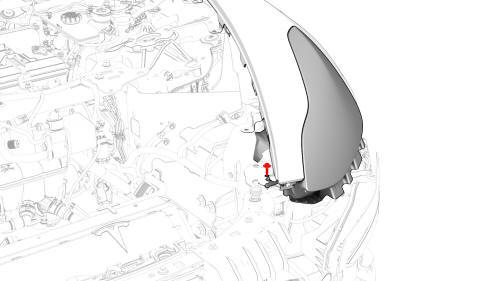
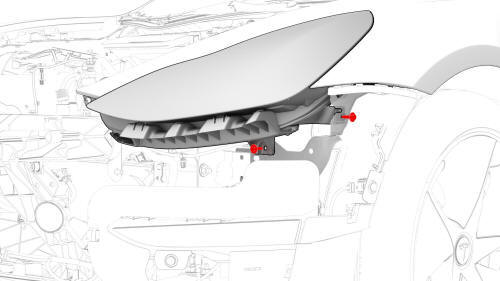
Headlight - LH- Remove
.jpg)
.jpg)
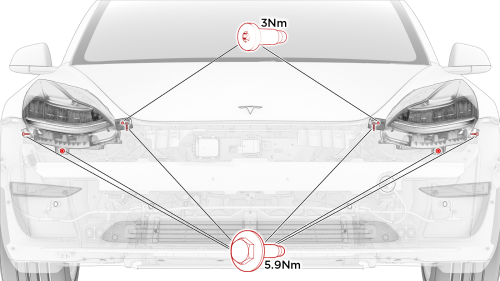
Headlight - LH- Install
 Torque 5.9 Nm
 Torque 3 Nm
READ NEXT:
 Light - Brake - High Mounted (Remove and Replace)
Remove
Remove the LH 2nd row seat side bolster. See Bolster - Side - Seat - 2nd
Row - LH (Remove and Replace).
Remove the LH side rail trim. See Trim - Side Rail - LH (Remove and
Install).
R
SEE MORE:
Seat Back - 2nd Row - RH (Remove and Install)
Remove
Remove the 2nd row lower seat cushion. See
Seat Cushion - Lower - 2nd Row (Remove and Replace).
Remove the RH 2nd row seat side bolster. See
Bolster - Side - Seat - 2nd Row - LH (Remove and Replace).
Release the clips that attach the bolster bracket, and the remove the
bracket fr
Compressor (Remove and Replace)
Compressor- Remove
Warning:
Only technicians who have been trained in High Voltage Awareness are
permitted to perform this procedure. Proper personal protective equipment (PPE)
and insulating HV gloves with a minimum rating of class 0 (1000V) must be worn
at all times a high voltage cable, bus
