Tesla Model 3: Heater - PTC (Remove and Replace)
Heater - PTC- Remove

Remove
- Raise and support the vehicle on a 2 post lift. See
Raise Vehicle - 2 Post Lift.
- Remove the rear underhood apron. See
Underhood Apron - Rear (Remove and Replace).
- Remove the 2nd row lower seat cushion. See
Seat Cushion - Lower - 2nd Row (Remove and Replace).
- Remove the LH center console side panel carpet. See
Carpet - Side Panel - Center Console - LH (Remove and Replace).
- Remove the RH instrument panel end cap. See
End Cap - Instrument Panel - LH (Remove and Replace).
- Remove the RH middle A-pillar trim. See
Trim - A-Pillar - Middle - LH (Remove and Replace).
- Remove the RH lower A-pillar trim. See
Trim - A-Pillar - Lower - LH (Remove and Replace).
- Remove the RH center console side panel carpet. See
Carpet - Side Panel - Center Console - LH (Remove and Replace).
- Remove the RH footwell cover. See
Cover - Footwell - Passenger (LHD) (Remove and Replace).
- Disconnect 12V power. See
12V Power (Disconnect and Connect).
- Perform the vehicle electrical isolation procedure. See
Vehicle Electrical Isolation Procedure.
.png)
- Remove the HV cap that covers the HV harness located on the LH side of
the penthouse.
- Remove the LH 2nd row seat side bolster. See
Bolster - Side - Seat - 2nd Row - LH (Remove and Replace).
- Remove the LH rear sill panel trim. See
Trim - Sill Panel - Rear - LH (Remove and Replace).
.jpg)
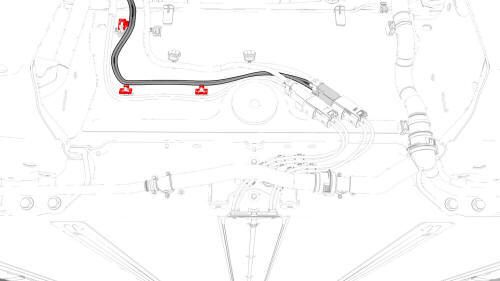
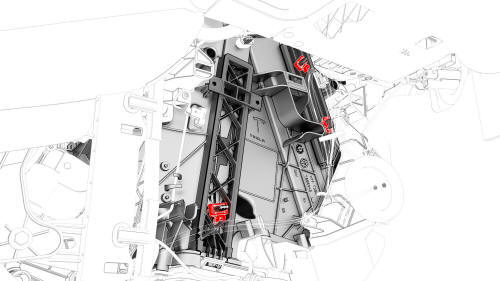
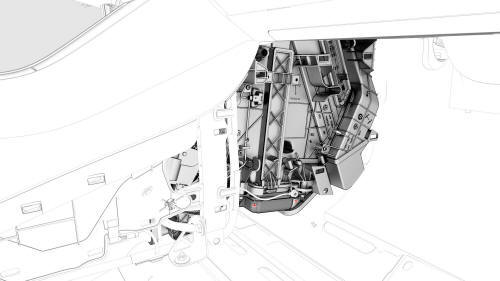
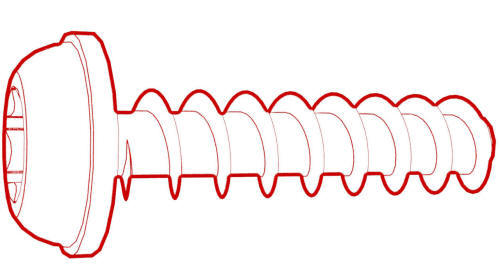
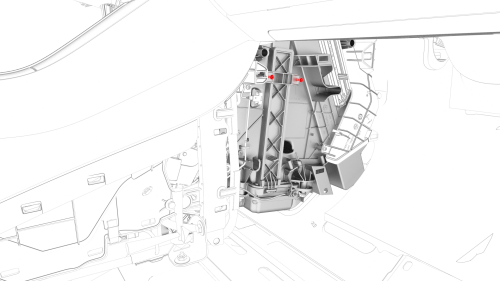
- Remove the bolts that attach the wiring harness bracket at the
penthouse.
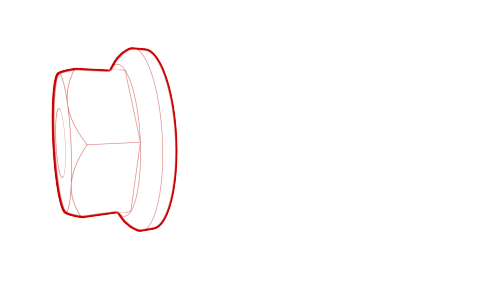
- Release the clips that attach the wiring harness bracket, and then
remove the bracket from the vehicle.
.jpg)
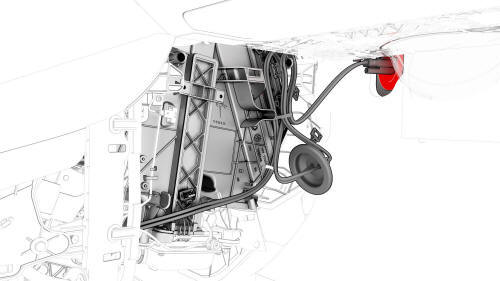
- Release the clip that attaches the wiring harness to the LH lower
C-pillar.
.jpg)
- Raise the handle to disconnect the electrical harness from the DC Input
assembly.
- Remove the front area shield panel. See
Panel - Aero Shield - Front (Remove and Replace).
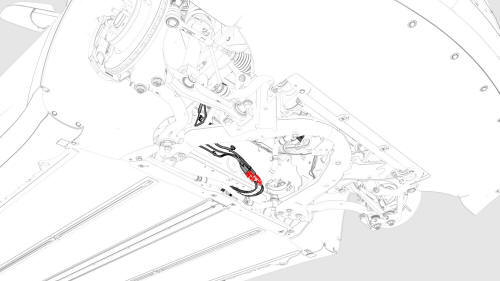
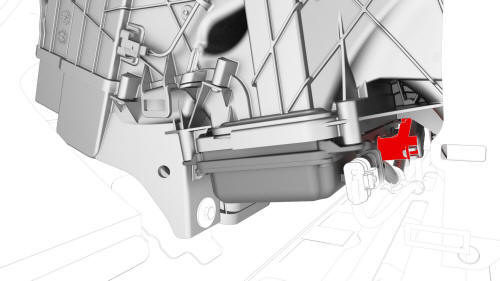
- Disconnect the HV harness connector from the PTC heater.
Note: Release the bracket from the body for better access to the
connector.
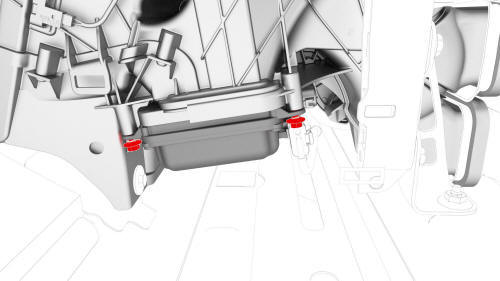
- Release the clips that attach the PTC heater electrical connector to the
body.
- Lower the vehicle.
- Remove the front passenger knee airbag. See
Airbag - Knee - Front Passenger (Remove and Replace).
- Remove the RH footwell duct. See
Duct - Footwell - RH (Remove and Replace).
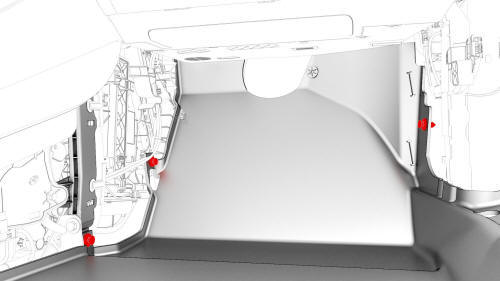
- Release the clips that attach the front RH carpet to the vehicle, and
then fold the front RH carpet rearwards.
- Disconnect the 12V electrical connector from the PTC heater.
- Release the clip that attaches the PTC heater electrical harness to the
HVAC assembly.
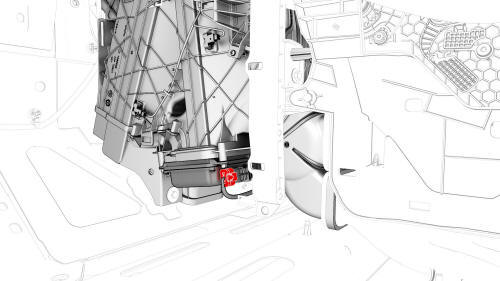
- Remove the bolts that attach the LH side of the PTC heater to the HVAC
assembly.
- Remove the clips that attach the PTC heater electrical harness to the
HVAC assembly.
.jpg)
- Remove the nut that attaches the instrument panel harness ground strap
to the PTC heater.
- Remove the grommet, and then carefully pull the HV cable through the
bulkhead.
Caution:
Do not damage the HV cable while feeding through the bulkhead.
- Remove the bolts that attach the RH side of the PTC heater to the HVAC
assembly, and then lower the PTC heater from the HVAC assembly.

- Use a razor blade to carefully cut the inner edge of the airbox side
cover, and then remove and discard the airbox side cover.
Caution:
Use caution when cutting the airbox. Avoid contact with the PTC heater.
- Slide the PTC heater out of the HVAC assembly, and then remove the PTC
heater from the vehicle.
- Remove the sealing plate from the PTC heater.
Note: Replace the sealing plate, if damaged.

Heater - PTC- Install
Install
- Install the sealing plate onto the new PTC heater.
Note: Failure to transfer the sealing plate has the potential of
introducing air or water leakage.
- Slide the PTC heater into the HVAC assembly, and then push the PTC
heater up to install it.
- Install the bolts that attach the RH side of the PTC heater to the HVAC
assembly.
 Torque 2.9 Nm
- Position the new airbox side cover for installation, and then install
the bolts that attach the airbox side cover to the HVAC assembly.
Torque 1.2 Nm
- Push the HV cable through the bulkhead, and then install the grommet.
Caution: Do not damage the HV cable while feeding through the
bulkhead.
Note: Apply lubricant to the HV cable, if necessary.
- Install the nut that attaches the instrument panel harness ground strap
to the PTC heater.
 Torque 5 Nm
- Install the clips that attach the PTC heater electrical harness to the
HVAC assembly.
- Instal the bolts that attach the LH side of the PTC heater to the HVAC
assembly.
Torque 2.9 Nm
- Install the clip that attaches the PTC heater electrical harness to the
HVAC assembly.
- Connect the 12V electrical connector to the PTC heater.
- Unfold the front RH carpet forward, and then install the clips that
attach the front RH carpet to the vehicle.
- Install the RH footwell duct. See
Duct - Footwell - RH (Remove and Replace).
- Install the front passenger knee airbag. See
Airbag - Knee - Front Passenger (Remove and Replace).
- Raise the vehicle fully.
- Install the clips that attach the PTC heater electrical connector to the
body.
- Connect the HV harness connector to the PTC heater.
Note: Install the bracket to the body.
- Install the front area shield panel. See
Panel - Aero Shield - Front (Remove and Replace).
- Lower the vehicle fully.
- Perform the penthouse air leak test. See
Penthouse Air Leak Test.
- Connect the charge port electrical harness to the DC Input assembly.
Note: Use 1 hand to support the electrical connector while
the other hand latches the locking tab.
Note: Make sure that the latch is not damaged and is fully secured
in the latched position.
- Install the clip that attaches the electrical harness to the LH lower
C-pillar.
- Install the bolts that attach the wiring harness bracket at the
penthouse.
.jpg) Torque 10 Nm
Torque 10 Nm
- Install the LH rear sill panel trim. See
Trim - Sill Panel - Rear - LH (Remove and Replace).
- Install the LH 2nd row seat side bolster. See
Bolster - Side - Seat - 2nd Row - LH (Remove and Replace).
- Install the HV cap onto the penthouse.
- Reconnect 12V power. See
12V Power (Disconnect and Connect).
- Install the RH footwell cover. See
Cover - Footwell - Passenger (LHD) (Remove and Replace).
- Install the RH center console side panel carpet. See
Carpet - Side Panel - Center Console - LH (Remove and Replace).
- Install the RH lower A-pillar trim. See
Trim - A-Pillar - Lower - LH (Remove and Replace).
- Install the RH middle A-pillar trim. See
Trim - A-Pillar - Middle - LH (Remove and Replace).
- Install the RH instrument panel end cap. See
End Cap - Instrument Panel - LH (Remove and Replace).
- Install the LH center console side panel carpet. See
Carpet - Side Panel - Center Console - LH (Remove and Replace).
- Install the 2nd row lower seat cushion. See
Seat Cushion - Lower - 2nd Row (Remove and Replace).
- Install the rear underhood apron. See
Underhood Apron - Rear (Remove and Replace).
READ NEXT:
HVAC Assembly- Remove
SPECIAL TOOLS
Kit, EPB Release, Handheld (1134520-00-A)
XP-10 Power Supply, XP-10 (1129348-00-A)
Remove
Remove the rear underhood apron. See
Underhood Apron - Rear (Remove a
SEE MORE:
Note: This procedure was formulated using a release candidate or
production model. Follow safety requirements and use extreme caution when
working on or near high-voltage systems and components.
Remove
Remove the front passenger knee airbag. See Airbag - Knee - Front
Passenger (Remove and Re
Active Grille Shutter (Remove and Replace)
Remove
Remove the cooling fan module. See Module - Cooling Fan (Remove and
Install).
Release the side clips that attach the active grille shutter to the
condenser fan module.
Release the lower clips that attach the active grille shutter to
 HVAC Assembly (Remove and Replace)
