Tesla Model 3: Car Computer - Install
Tesla Model 3 2017-2025 Service Manual / Infotainment / Car Computer / Car Computer (Remove and Replace) / Car Computer - Install
Install
- Put on an antistatic wrist strap, and connect the strap to a body ground point.
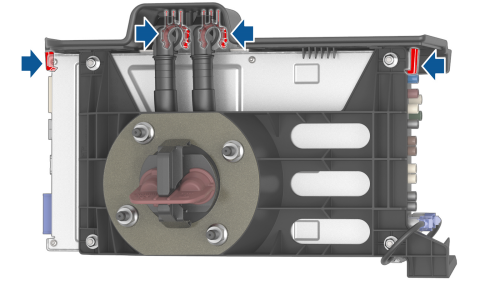
- If not already installed, position a car computer shroud on the car computer, and then install the clips (x4) that attach the shroud to the computer.
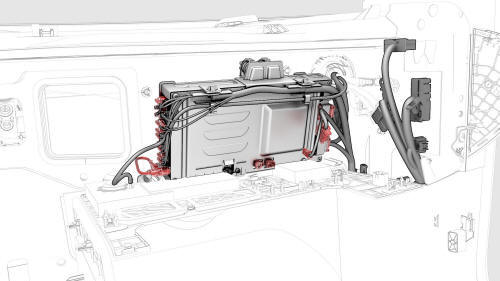
- Bring the car computer to where it installs into the vehicle, and then connect the electrical harness connectors (x21) to the car computer.
Caution: Avoid spilling coolant on the electrical connectors.
Caution: Take care not to damage the passenger airbag harness and connectors during installation.
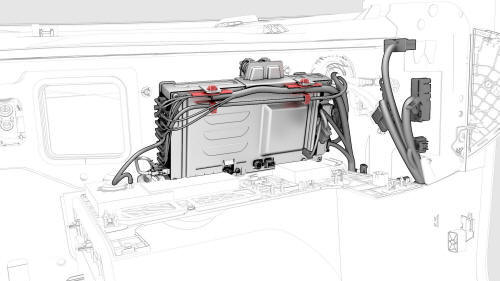
- Fasten the clips that attach the electrical harness to the car computer.
- Move the car computer forward so that the mounting studs pass through the firewall.
- Remove the antistatic wrist strap.
- Remove the absorbent material from beneath the car computer.
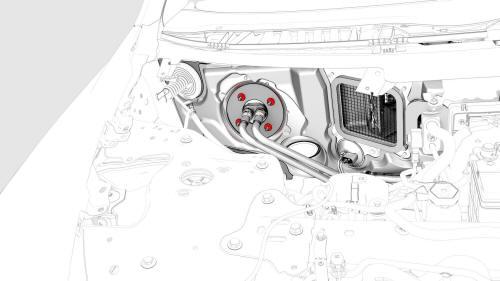
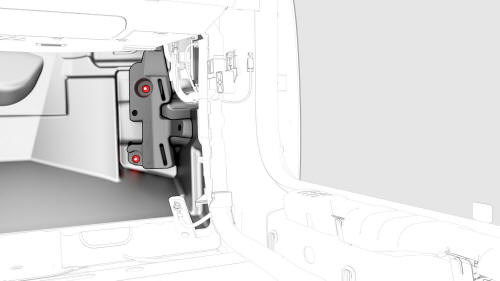
- Install new nuts (x4) to attach the car computer to the body.
.png) Torque 7.1 Nm
Torque 7.1 Nm
- Install the RH carpet locator bracket to the body, and then install the
nuts that attach the RH carpet locator bracket to the body.
.png) Torque 2.5 Nm
Torque 2.5 Nm
.jpg)
- Unfold the front RH carpet forward, and then install the clips that attach the front RH carpet to the body.
- Install the RH footwell duct. See Duct - Footwell - RH (Remove and Replace).
- Install the RH center console side panel carpet. See Carpet - Side Panel - Center Console - LH (Remove and Replace).
- Install the RH lower A-pillar trim. See Trim - A-Pillar - Lower - LH (Remove and Replace).
- Bring the emergency footwell speaker panel to the vehicle, and then connect the harness to the emergency footwell speaker connector.
- Install the emergency footwell speaker panel to the instrument panel, and then fasten the clips that attach the emergency footwell speaker panel to the instrument panel.
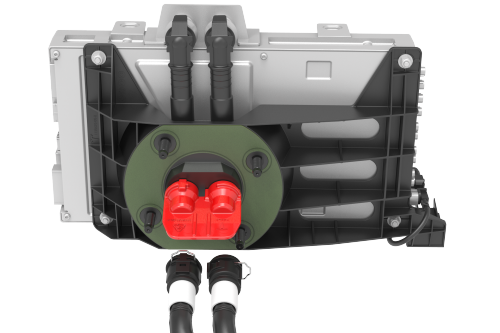
- Remove the car computer fluid port plug from the car computer coolant fittings.
- Remove the plugs from the female fittings of the coolant hoses.
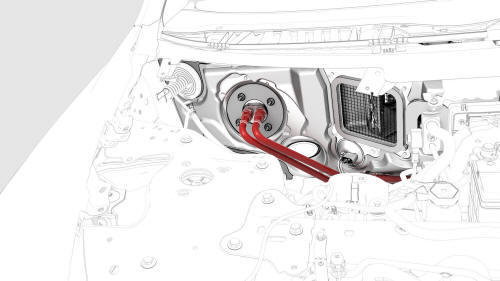
- Release the clips on the coolant hoses, connect the coolant hoses to the car computer, and then fasten the clips.
- Remove the absorbent material from below the car computer coolant hose connections.
- Connect 12V power. See 12V Power (Disconnect and Connect).
- If a new car computer is being installed, refer to SI-18-21-001 for further instruction.
- Refill the cooling system. See Cooling System (Vacuum Refill).
- Install the outer HVAC plenum duct. See Duct - HVAC Plenum - Outer (Remove and Replace).
- Install the underhood storage unit. See Underhood Storage Unit (Remove and Replace).
READ NEXT:
 Connectivity Board - Car Computer (Remove and Replace)
Note: This procedure was formulated using a release candidate or
production model. Follow safety requirements and use extreme caution when
working on or near high-voltage systems and components.
R
 SD Card - Car Computer (Remove and Replace)
Remove
Remove the 2nd row lower seat cushion. See Seat Cushion - Lower - 2nd
Row (Remove and Replace).
Remove the rear underhood apron. See Underhood Apron - Rear (Remove and
Replace).
Remove
 SIM Card - Car Computer (Remove and Replace)
DRAFT
Warning:
This procedure was derived from pre-production computer models, and
might not reflect the real-world situation. Warnings and cautions might be
missing. Follow safety requirements a
SEE MORE:
 12V Battery
The 12V battery used in Model 3 is similar to the lead acid batteries used in
most internal combustion engine vehicles. Lead acid batteries are sometimes
referred to as "flooded" because they are filled (flooded) with sulfuric acid.
Warning: Lead acid batteries contain an electrolyte with dilute
 How It Works
Your Model 3 includes the following Autopilot components that actively
monitor the surrounding
roadway:
A camera is mounted above the rear license plate.
Ultrasonic sensors are located in the front and rear bumpers.
A camera is mounted in each door pillar.
Three cameras are mounted
© 2019-2025 Copyright www.tmodel3.com

