Tesla Model 3: Module - Body Controller - LH (Remove and Replace)
Module - Body Controller - LH - Remove

Remove
- Remove the 2nd row lower seat cushion. See Seat Cushion - Lower - 2nd
Row (Remove and Replace).
- Remove the rear underhood apron. See Underhood Apron - Rear (Remove and
Replace).
- Disconnect 12V power. See 12V Power (Disconnect and Connect).
- Remove the LH instrument panel end cap. See End Cap - Instrument Panel -
LH (Remove and Replace).
- Remove the LH middle A-pillar trim. See Trim - A-Pillar - Middle - LH (Remove
and Replace).
- Remove the LH lower A-pillar trim. See Trim - A-Pillar - Lower - LH (Remove
and Replace).
- Remove the driver footwell cover. See Cover - Footwell - Driver (Remove
and Replace).
- Remove the driver knee airbag. See Airbag - Knee - Driver (Remove and
Replace).
- Remove the LH footwell duct. See Duct - Footwell - LH (Remove and
Replace).
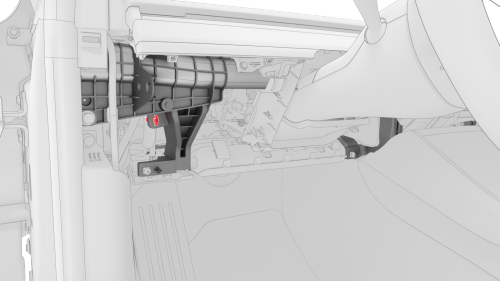
- Release the electrical harness clip from the IP carrier.
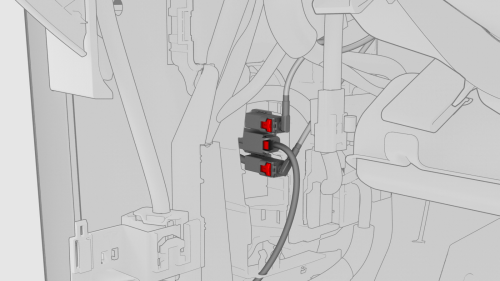
- Disconnect the clips that attach the LH front door electrical connectors
to the LH body controller module.
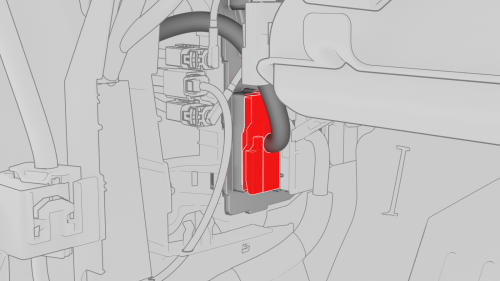
- Release the connector lock, and then remove the electrical connector
that attaches the LH front door electrical connector to the LH body
controller module.
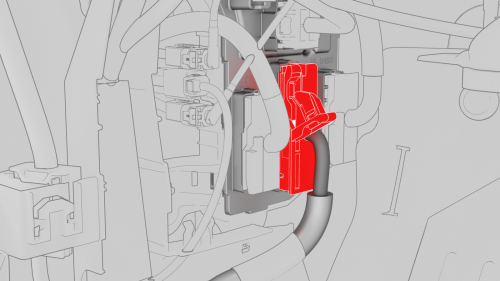
- Release the connector lock, and then remove the driver seat electrical
connector from the LH body controller module.
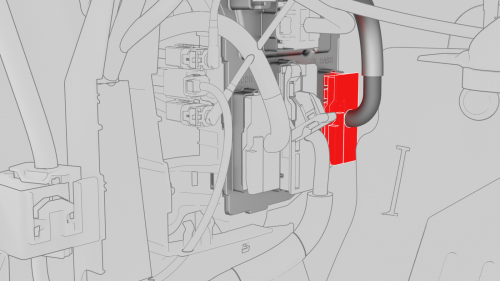
- Release the connector lock, and then remove the instrument panel
electrical connector from the LH body controller module.
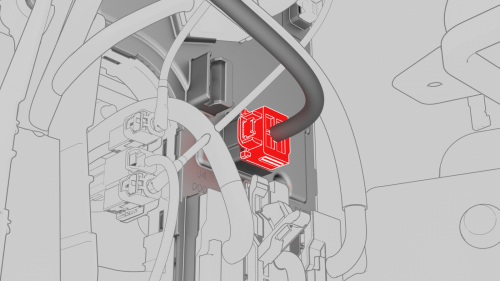
- Remove the HVAC electrical connector from the LH body controller module.
.png)
- Disconnect the inline electrical harness connector X909 from the LH body
harness, and then separate it from the LH body controller module.
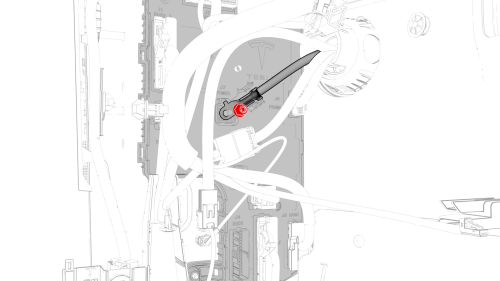
- Remove and discard the nut that attaches the 12V power cable to the LH
body controller module..
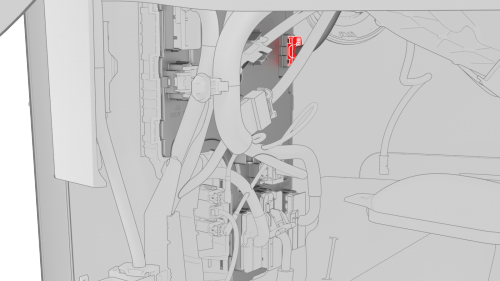
- Disconnect the front wiring harness connector from the LH body
controller module.
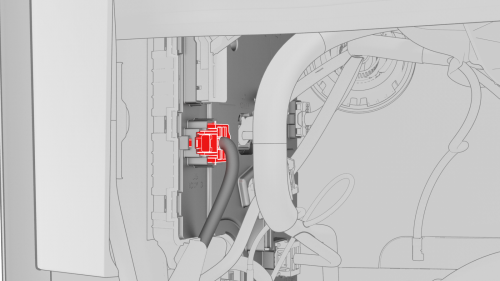
- Disconnect the body 3 electrical connector from the LH body controller
module.
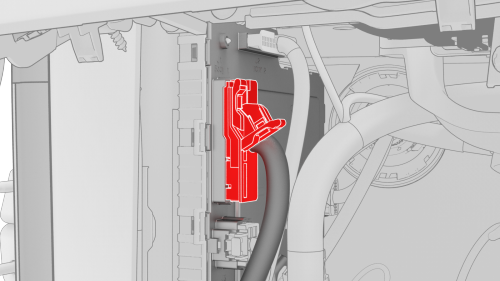
- Disconnect the body 1 electrical connector from the LH body controller
module.
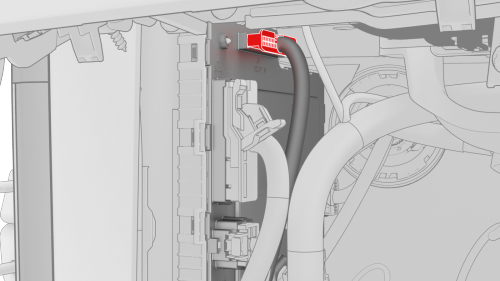
- Disconnect the body 2 electrical connector from the LH body controller
module.
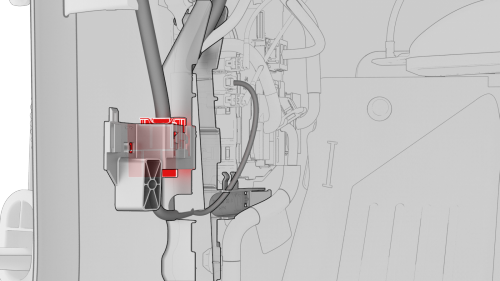
- Disconnect the electrical connector from the headliner electrical
connector.
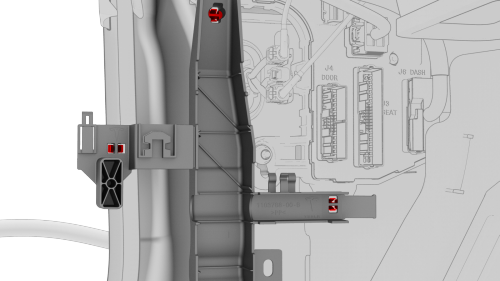
- Release the electrical harness clips that attach the LH body controller
module to the body.
- Move the LH body harness away from the LH body controller module.
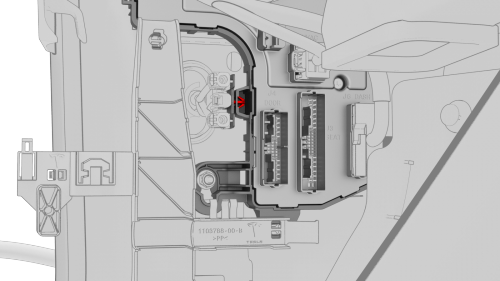
- Release the clip that attaches the LH front door electrical harness to
the LH body controller module.
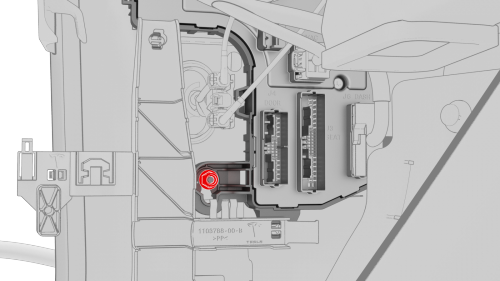
- Remove and discard the nut that attaches the LH body controller module
to the vehicle.
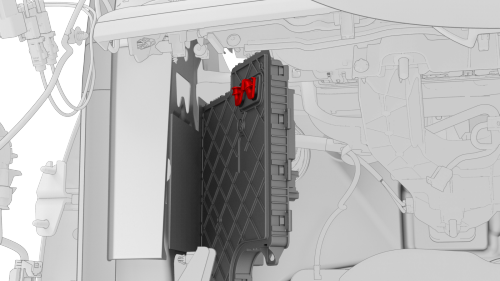
- Slide the LH body controller upwards to release the W-clip, and then
move the LH body controller module out from underneath the instrument panel.
- Remove the LH body controller module from the vehicle.

- If the LH body controller module has a shroud installed, release the
clips that attach the shroud to the module.

Module - Body Controller - LH - Install
Install
- Install the clip that attach the shroud to the LH body controller module.
Note: Make sure that both clips are fully seated so that the edge
of the shroud is parallel with the line on the back of the LH body controller
module.

- Maneuver the LH body controller module into position under the IP
carrier. Align the W-clip with the body cutout, and then slide down to
attach the LH body controller module to the body.

- Install new nut that attaches the LH body controller module onto the
body.
Torque 6 Nm
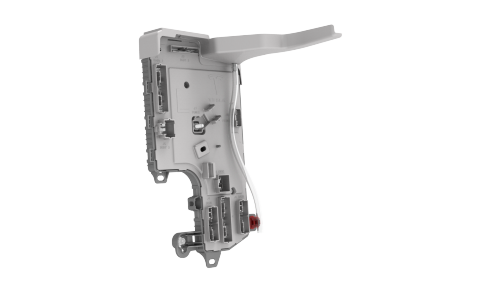
- Install the clip that attaches the shroud drain hose to the tab on the
LH body controller module.

- Install the LH front door harness clip to the LH body controller module.

- Move the LH body harness towards the left side of the LH body controller
module, and then attach the harness clips to the LH body controller module.

- Connect the electrical connector to the headliner electrical connector.

- Connect the body 2 electrical connector onto the LH body controller
module.

- Connect the body 1 electrical connector onto the LH body controller
module.

- Connect the body 3 electrical connector onto the LH body controller
module.

- Connect the front wiring connector onto the LH body controller module.

- Install new nut that attaches the 12V power cable to the LH body
controller module.
Torque 8.5 Nm
.png)
- Connect the inline electrical connector X909 to the LH body harness, and
then clip it to the LH body controller module.

- Install the HVAC electrical connector onto the LH body controller module.
Note: Make sure that the HVAC electrical connector is fully seated,
and then engage the connector lock.

- Install the instrument panel electrical connector onto the LH body
controller module.
Note: Make sure that the instrument panel electrical
connector is fully seated, and then engage the connector lock.

- Install the driver seat electrical connector onto the LH body controller
module.
Note: Make sure that the driver seat electrical connector is fully
seated, and then engage the connector lock.

- Install the electrical connector that attaches the LH front door
electrical connector to the LH body controller module.
Note: Make sure that the LH front door electrical connector is
fully seated, and then engage the connector lock.

- Connect the clips that attach the LH front door electrical connectors to
the LH body controller module.

- Connect the electrical harness clip onto the IP carrier.
- Install the LH footwell duct. See Duct - Footwell - LH (Remove and
Replace).
- Install the driver knee airbag. See Airbag - Knee - Driver (Remove and
Replace).
- Install the driver footwell cover. See Cover - Footwell - Driver (Remove
and Replace).
- Install the LH lower A-pillar trim. See Trim - A-Pillar - Lower - LH (Remove
and Replace).
- Install the LH middle A-pillar trim. See Trim - A-Pillar - Middle - LH (Remove
and Replace).
- Install the LH instrument panel end cap. See End Cap - Instrument Panel
- LH (Remove and Replace).
- Connect 12V power. See 12V Power (Disconnect and Connect).
- Install the rear underhood apron. See Underhood Apron - Rear (Remove and
Replace).
- Install the 2nd row lower seat cushion. See Seat Cushion - Lower - 2nd
Row (Remove and Replace).
- Update the vehicle firmware.
- Connect a laptop with Toolbox to the vehicle.
- Using Toolbox, type Seat in the search field.
Note: Make sure that Actions is selected in Toolbox, if not
already.
- Using Toolbox, click the play button next to PROC_VCLEFT_SEAT-CALIBRATE,
and then select Run.
- Using Toolbox, type Column in the search field.
Note: Make sure that Actions is selected in Toolbox, if not already.
- Using Toolbox, click the play button next to PROC-VCLEFT_
X_STEERING-COLUMN-CALIBRATION, and then select Run.
- Using Toolbox, type Window in the search field.
Note: Make sure that Actions is selected in Toolbox, if not
already.
- Using Toolbox, click the play button next to PROC_VCLEFT-VCRIGHT_
X_WINDOW-CALIBRATION, and then select Run.
- Disconnect the laptop from the vehicle.
READ NEXT:
Module - Body Controller - RH - Remove
Remove
On the touchscreen, power off the climate control system, and wait at
least 30 seconds for the climate control system to completely shut down.
Remo
SEE MORE:
Remove
Fold down the LH 2nd row seat.
Pull the 2nd row side bolster inward, and then move the bolster up to
remove from the vehicle.
Remove and discard the bolster plastic bracket from the vehicle.
Note: The bracket might have come out with the bolster
Install
Install new bolster
Windshield (Remove and Replace) - Remove
Remove
Remove the cowl screen panel. See Panel - Cowl Screen (Remove and
Replace).
Disconnect the electrical harness from the windshield heater connector.
Partially close the hood.
Caution:
Use care not to damage the dashboard.
Place a fende


.png)


.png)


