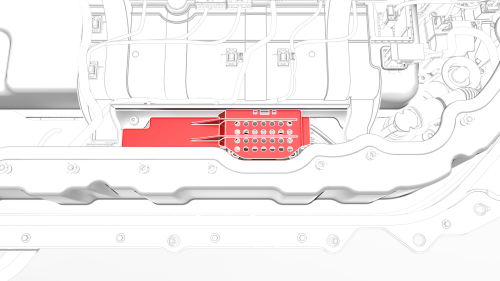
Tesla Model 3: Fuse - A/C Compressor - HV Battery- Install
Tesla Model 3 2017-2025 Service Manual / Battery System / HV Battery Electrical Components / Fuse - A/C Compressor - HV Battery (Remove and Replace) / Fuse - A/C Compressor - HV Battery- Install
Install

- Install the A/C compressor fuse to the RH penthouse bus, and then
install new nuts to attach the fuse to the bus.
 Torque 2.5 Nm
.jpg) Generic Measurement - Actual busbars and fasteners might appear
different
Generic Measurement - Actual busbars and fasteners might appear
different
- Use the Hioki resistance meter to measure the resistance at the HV joint between the penthouse bus and the LH side of the A/C compressor fuse body .
Note: The maximum acceptable resistance is 0.105 mΩ (105 μΩ). If the resistance is above this value, escalate a Toolbox session, as appropriate.
.jpg) Generic Measurement - Actual busbars and fasteners might appear
different
Generic Measurement - Actual busbars and fasteners might appear
different
- Use the Hioki resistance meter to measure the resistance at the HV joint between the RH side of the A/C compressor fuse and the respective ring terminal plating.
Note: The maximum acceptable resistance is 0.145 mΩ (145 μΩ). If the resistance is above this value, escalate a Toolbox session, as appropriate.

- Install the fuse access insulator on the RH penthouse bus cover, fasten the clips that attach the insulator to the cover, and lower the high voltage controller.
- Install the pyrotechnic battery disconnect into the penthouse. See Pyrotechnic Battery Disconnect (Remove and Replace).
READ NEXT:
 Fuse - Cabin Heater - HV Battery- Remove
SPECIAL TOOLS
Ratchet, 1/4" Sq Dr, HV Insulated (1057602-00-A)
Ext Bar, Wobble, 1/4" Dr, HV Insulated (1057603-00-A)
Skt, 1/4" Sq Dr, 8mm, HV Insulated (1057604-00-A)
Magnet, Flexible, HV Insulated,
 Fuse - Cabin Heater - HV Battery- Install
Install
Install the PTC heater fuse to the RH penthouse bus, and then install
new nuts to attach the fuse to the bus.
Torque 2.5 Nm
Generic Measurement - Actual busbars and fasteners might
SEE MORE:
 Mount - Rear Drive Unit - LH (Remove and Replace)
DRAFT
Warning:
This procedure was derived from pre-production computer
models, and might not reflect the real-world situation. Warnings
and cautions might be missing. Follow safety requirements and
use extreme caution when w
 Starting and Powering Off
Starting
When you open a door, Model 3 powers on the
touchscreen and you can operate all controls.
To drive Model 3:
PRESS THE BRAKE PEDAL - Model 3
powers on and is ready to drive.
SELECT A GEAR - Move the gear lever all
the way down for Drive and all the way up
for Reverse.
Not
© 2019-2025 Copyright www.tmodel3.com

