Tesla Model 3: ECU - Headlight (Remove and Replace)
Remove
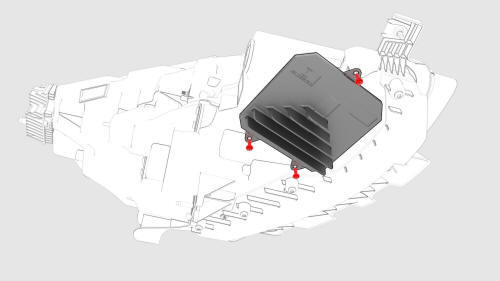
Note: Release the locking tab, and then pry the electrical
connector with a flat head screwdriver.
Install Note: Position the seal to the headlight ECU, if necessary. Note: Align the electrical connector to the headlight ECU, and then
close the locking tab while pushing the connector into the headlight ECU. Note: Make sure that the electrical connector and locking
tab are fully seated. Note: Press the headlight ECU downward, and then turn it to align
the fastener holes and anti-rotating guides.
Headlights - Adjust - EMEA (Tool Method)
Adjust Headlights Using a Headlight Tester This procedure is under development and will be available soon.ECU - Headlight - Remove


ECU - Headlight - Install
.png) Torque
2.5 Nm
Torque
2.5 Nm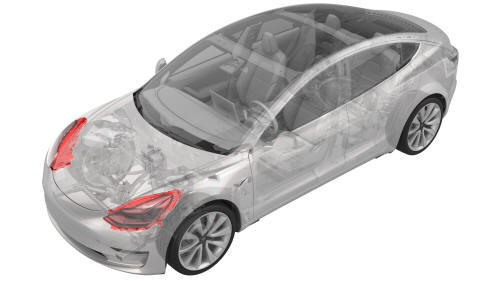
READ NEXT:
 Headlights - Adjust - EMEA (Wall Method)
Adjust Headlights Using a Wall
Apply Tape to Wall
Apply tape to a wall 23.6 in (60 cm) from the ground.
Apply tape to the floor 31.1 ft (9.5 m) from the wall.
Note: EU vehicles require a 1 to
SEE MORE:
Harness - Trunk (Remove and Replace)
Harness - Trunk- Remove
Remove
Remove the package tray trim. See Trim - Package Tray (Remove and
Install).
Disconnect the trunk electrical harness connectors.
Remove and discard the bolt that attaches the ground strap to the body.
Push the trunk electrical wiring harness through
Buckle - 2nd Row - Center (Remove and Replace)
Note:
This procedure was formulated using a release candidate or production
model. Follow safety requirements and use extreme caution when working on or
near high-voltage systems and components.
SPECIAL TOOLS
Tool, Inductive Heating (1032900-00-A)
Remove
Remove the 2nd row seat cushion. See Sea
