Tesla Model 3: Actuator - 5-Way Valve (Dual Motor) (Remove and Replace)
Tesla Model 3 2017-2025 Service Manual / Thermal Management / Cooling System / Actuator - 5-Way Valve (Dual Motor) (Remove and Replace)

SPECIAL TOOLS
Kit, Svc Plug, Cooling Hose, Model 3 (1135762-00-A)
Wrench, Diverter Valve, Model 3 (1447556-00-A)
Remove
- Remove the superbottle. See Superbottle (Dual Motor) (Remove and Replace).

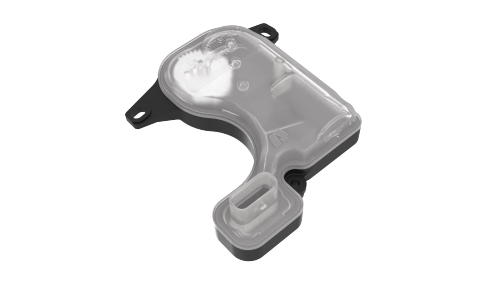
- Remove the screws that attach the 5-way valve actuator to the 5-way valve cover.

- Remove the 5-way valve actuator from the 5-way valve cover.
Install

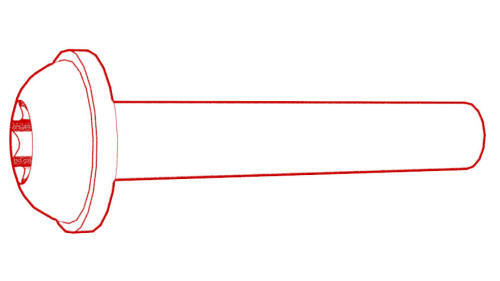
One spline (highlighted red) is larger than the other splines
- Use the diverter valve wrench to align the larger stemshell shaft spline with the larger recess on the 5-way valve actuator, and then position the 5-way valve actuator on the 5-way valve cover.

Caution:
Very little force is needed to mate the actuator to the cover. If the actuator does not mate to the cover easily, remove the actuator and check the stemshell shaft alignment.
- Install the screws that attach the 5-way valve actuator to the 5-way
valve cover.
 Torque 2 Nm
 - Install the superbottle. See Superbottle (Dual Motor) (Remove and Replace).
READ NEXT:
 Actuator - 5-Way Valve (RWD) (Remove and Replace)
SPECIAL TOOLS
Wrench, Diverter Valve, Model 3 (1447556-00-A)
Remove
Disconnect 12V power. See 12V Power (Disconnect and Connect).
Remove the front aero shield. See Panel - Aero Shield - Front (Re
Coolant Pump - HV Battery (Remove and Replace)
Coolant Pump - HV Battery - Remove
Remove
Remove the underhood storage unit. See Underhood Storage Unit (Remove
and Replace).
Disconnect 12V power. See 12V Power (Disconnect and Connect).
Remo
SEE MORE:
Valance - Front Fascia (Remove and Replace)
Remove
Remove the front aero shield panel.
Release the clips (x2) that attach the valance to the stabilizer bar
brackets.
Remove the push clips (x4) that attach the LH and RH sides of the
valance to the wheel liners.
Note: Remove the outer clips as necessary to allow for easier
ac
Flood Ports - 2nd Generation (Remove and Replace)
Flood Ports - 2nd Generation (Remove and Replace) - Remove
Remove
Connect a laptop with Toolbox 3 to the vehicle.
In Toolbox, click in the Search field, and then click Tools.
From the Tools menu, click Active Alerts.
Click Read Alerts and check for a BMS_a123, BMS_a151, or a BMS_a035
alert
© 2019-2025 Copyright www.tmodel3.com
