Tesla Model 3: Shield - Dust - Brake - Rear - LH - Remove
Tesla Model 3 2017-2025 Service Manual / Brakes / Brake Discs and Calipers / Shield - Dust - Brake - Rear - LH (Remove and Replace) / Shield - Dust - Brake - Rear - LH - Remove

SPECIAL TOOLS
Card, Magnetic Field Viewer (1062500-00-A)
Tool, Hub Puller, Hydraulic (1096075-00-A)
Remove
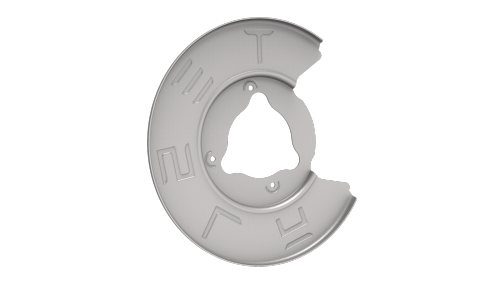
Note: This procedure describes the removal and installation of the revised rear brake dust shield (1044665-00-C (LH) and 1044666-00-C (RH) or newer).- Remove any wheel caps or covers, and then loosen the LH rear wheel lug nuts. Do not remove the wheel at this time. See Wheel (Remove and Install).
.png)
- Loosen the LH rear drive unit halfshaft nut.
- Raise and support the vehicle. See Raise Vehicle - 2 Post Lift.
- Use Toolbox to place the vehicle into EPB Service Mode. See Release Parking Brake Using Toolbox.
- Remove the LH rear wheel. See Raise Vehicle - 2 Post Lift.
.jpg)
- Remove and discard the LH rear drive unit halfshaft nut.
- Remove the LH rear brake rotor. See Brake Rotor - Rear - LH (Remove and Replace).
- Position the hub puller tool on the LH rear wheel studs, and then hand-tighten the wheel lug nuts (x5).
- Use the hub puller to separate the halfshaft from the hub splines.
Tip: While holding the hub in position, turn the hydraulic hub puller tool handle clockwise to separate the LH rear drive unit halfshaft from the hub splines.
.png)
Halfshaft hidden for clarity
- Remove and discard the bolts that attach the LH rear hub to the knuckle, and then remove the hub from the vehicle.

- Remove the bolts that attach the LH rear brake dust
shield to the knuckle, and then remove the dust shield
from the vehicle.
READ NEXT:
 Shield - Dust - Brake - Rear - LH - Install
Install
Install the bolts that attach the LH rear bra
Shield - Dust - Brake - Rear - LH and RH (Retrofit) - Remove
SPECIAL TOOLS
Card, Magnetic Field Viewer (1062500-00-A)
Tool, Hub Puller, Hydraulic (10960
SEE MORE:
Door - Rear - LH (Remove)
Remove
Open the rear LH door, and fully lower the window.
Pass a shop towel halfway through the striker, and close the door so
that it rests against the shop towel.
Open the front LH door.
Release the clips (x4) of the rear LH door electrical harness seal at
the B-pillar, and pull
Removing Ice From Door Handle
In severe winter conditions, ice buildup within
the door handle can prevent the door handle
from opening. The process for freeing a Model
3 door handle is slightly different than other
door handles; you can usually remove the ice
with a few forceful bumps to the door handle
using the bottom of
© 2019-2025 Copyright www.tmodel3.com
