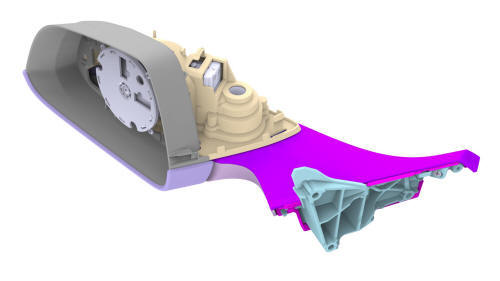
Tesla Model 3: Mirror - Door - LH (Remove and Replace)
Tesla Model 3 2017-2025 Service Manual / Exterior Fittings / Exterior Mirrors / Mirror - Door - LH (Remove and Replace)

Remove

- Use a plastic trim tool to pry up along the inner edge of the mirror cover.

- Lift upward to release the tabs that attach the mirror cover to the LH door mirror, and then remove the mirror cover.
- Remove the LH front door trim panel. See Panel - Door Trim - Front - LH (Remove and Install).
.jpg)
- Disconnect the mirror electrical harness from the connectors.
- Release the forward clip of the door glass run seal to expose the mirror mounting bolt.
.jpg)
- Remove the bolts that attach the LH door mirror to the door. Torque 15 Nm
Note: Use only hand tools to remove or install the fasteners. Do not use impact or power tools.
.jpg)
- Release the remaning clips that attach the door glass run seal to the door, and then remove the seal from the door.
Caution:
To prevent glass run clip damage, gently pry the clips one at a time using a trim removal tool.

- Release the clip that attaches the LH door mirror to the door, and then
remove the mirror from the door.

Install
Installation procedure is the reverse of removal.
READ NEXT:
 Skull Cap - Door Mirror - LH (Remove and Replace)
Remove
Outside Edge of Skull Cap
Inside Edge of Skull Cap
Pull outward to release the clips that attach the rear of the LH door
mirror skull cap to the LH door mirror.
Pry up along the
 Applique - B-Pillar - LH (Remove and Replace)
Applique - B-Pillar - LH (Remove and Replace) -
Remove
Remove
Open the LH front and rear doors.
Release the clips that attach the B-pillar applique fastener cover to
the vehicle, and the
SEE MORE:
 Inverter - Rear Drive Unit (Remove and
Replace)
Inverter - Rear Drive Unit - Remove
SPECIAL TOOLS
Skt, 3/8in Dr, 10EP Torx Plus External
(1130479-00-A)
Lever Lock, HV Connector, Model 3 (1140311-00-A)
 Mount - Rear Drive Unit - LH (Remove and Replace)
DRAFT
Warning:
This procedure was derived from pre-production computer
models, and might not reflect the real-world situation. Warnings
and cautions might be missing. Follow safety requirements and
use extreme caution when w
© 2019-2025 Copyright www.tmodel3.com

