Tesla Model 3: Harness - Thermal Beam (Remove and Replace)
Harness - Thermal Beam- Remove
- Remove the underhood storage unit. See Underhood Storage Unit (Remove
and Replace).
- Disconnect 12V power. See 12V Power (Disconnect and Connect).
.jpg)
- Release the clips that attach the HVAC plenum outer duct to the HVAC
plenum inner duct, and then remove the outer duct.
.png)
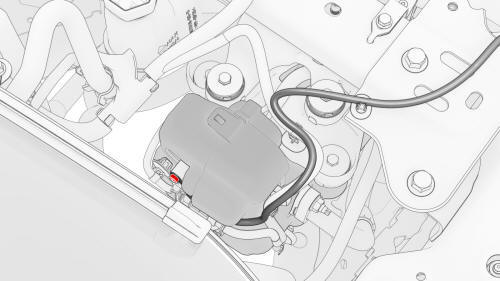
- Remove the bolt that attaches the thermal beam electrical harness cover
to the front body controller module, and then remove the cover.
.png)
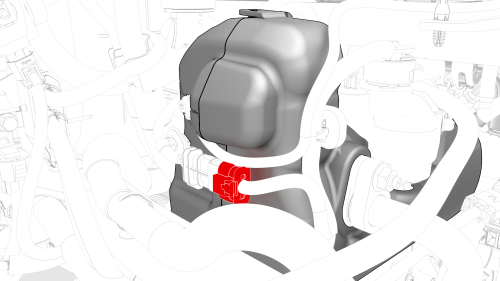
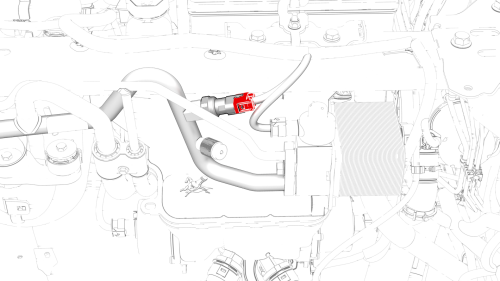
- Disconnect the thermal beam electrical harness from the front body
controller module connector
.png)
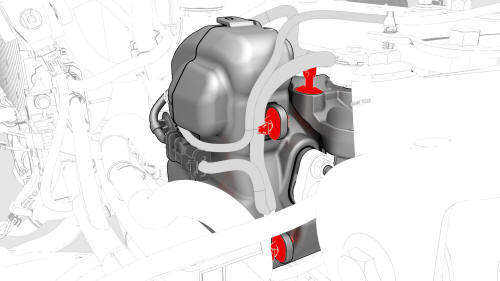
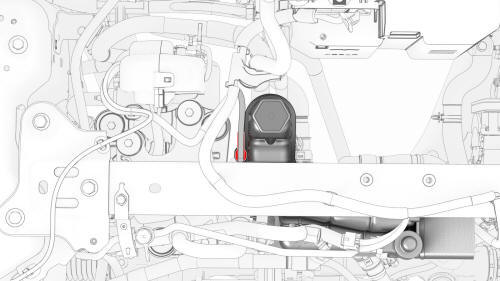
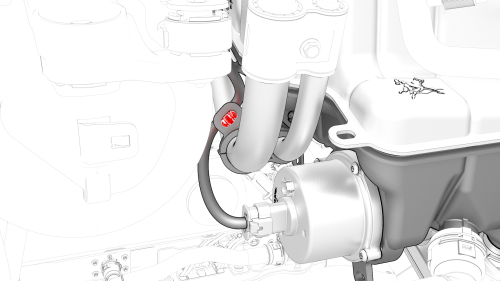
- Release the clip that attaches the suction/liquid lines to the body near
the TXV.
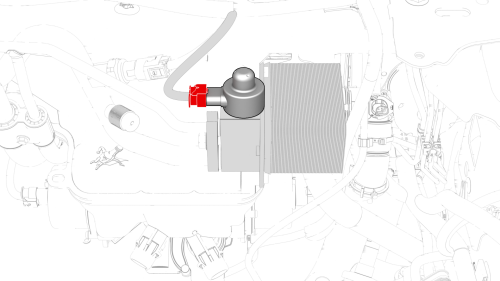
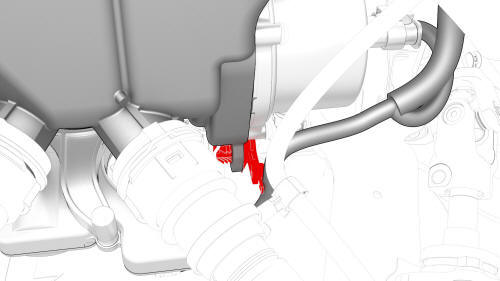
- Remove the bolt that attaches the thermal beam electrical harness ground
terminal to the compressor.
- Disconnect the thermal beam electrical harness from the compressor
connector.
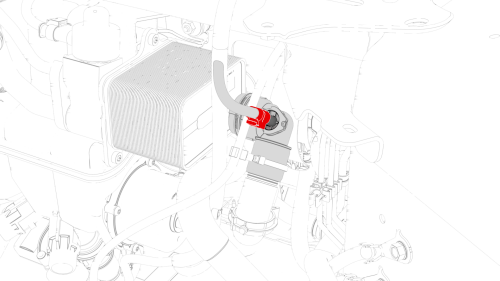
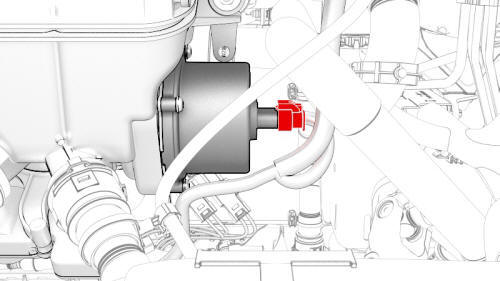
- Disconnect the thermal beam electrical harness from the high pressure
transducer connector.
- Release the clips that attach the thermal beam electrical harness to the
compressor and compressor bracket.
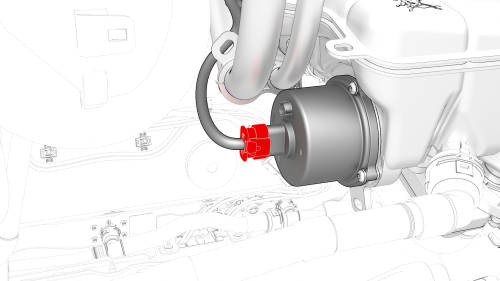
- Disconnect the thermal beam electrical harness from the low pressure
transducer connector.
- Disconnect the thermal beam electrical harness from the chiller and EXV
assembly connector.
- Disconnect the thermal beam electrical harness from the coolant
temperature sensor connector.
- Disconnect the thermal beam electrical harness from the 5-way valve
actuator connector.
- Disconnect the thermal beam electrical harness from the HV battery
coolant pump connector.
- Disconnect the thermal beam electrical harness from the powertrain
coolant pump connector.
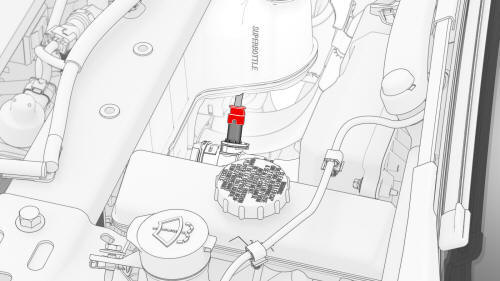
- Release the clip that attaches the thermal beam electrical harness to
the superbottle.

- Release the clip that attaches the thermal beam electrical harness to
the chiller and EXV assembly hose, and then remove the electrical harness
from the hose.
- Release the clip that attaches the thermal beam electrical harness to
the superbottle.
- Release the clip that attaches the thermal beam electrical harness to
the suction/liquid lines.
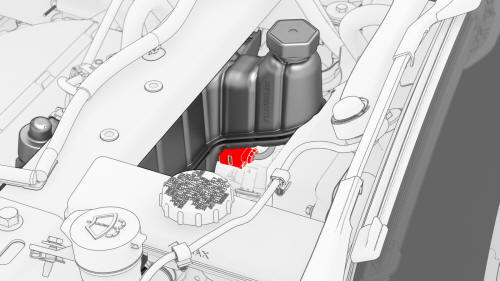
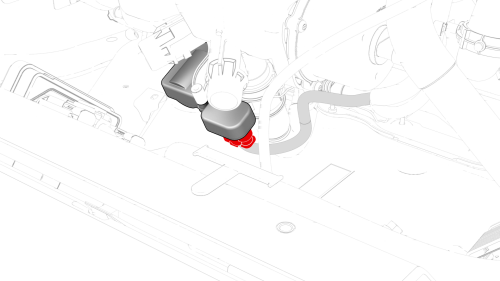
- Disconnect the thermal beam electrical harness from the superbottle
level sensor connector.
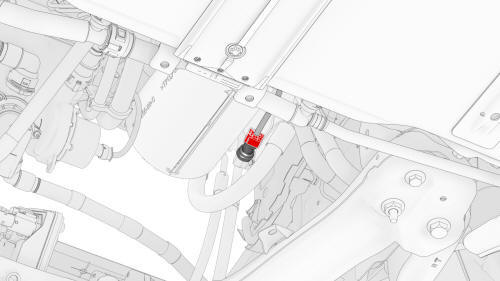
- Disconnect the thermal beam electrical harness from the powertrain pump
to sill hose coolant temperature sensor connector.
.jpg)
- Release the clips that attach the thermal beam electrical harness to the
shock tower brace.
- Remove the thermal beam electrical harness from the vehicle
Harness - Thermal Beam- Install
Install
- Fasten the clips that attach the thermal beam electrical harness to the
shock tower brace.
- Install the bolt that attaches the thermal beam electrical harness
ground terminal to the RH shear wall.
 Torque 10 Nm
- Connect the thermal beam electrical harness to the powertrain pump to
sill hose coolant temperature sensor connector.
- Connect the thermal beam electrical harness to the superbottle level
sensor connector.
- Fasten the clip that attaches the thermal beam electrical harness to the
suction/liquid lines.
- Fasten the clip that attaches the thermal beam electrical harness to the
superbottle.
- Install the thermal beam electrical harness to the chiller and EXV
assembly hose, and then fasten the clip that attaches the electrical harness
to the hose.
- Fasten the clip that attaches the thermal beam electrical harness to the
superbottle.
- Connect the thermal beam electrical harness to the powertrain coolant
pump connector.
- Connect the thermal beam electrical harness to the HV battery coolant
pump connector.
- Connect the thermal beam electrical harness to the 5-way valve actuator
connector.
- Connect the thermal beam electrical harness to the coolant temperature
sensor connector.
- Connect the thermal beam electrical harness to the chiller and EXV
assembly connector.
- Connect the thermal beam electrical harness to the low pressure
transducer connector.
- Fasten the clips that attach the thermal beam electrical harness to the
compressor and compressor bracket.
- Connect the thermal beam electrical harness to the high pressure
transducer connector.
- Connect the thermal beam electrical harness to the compressor connector.
- Install the bolt that attaches the thermal beam electrical harness
ground terminal to the compressor.
.png) Torque 6 Nm
Torque 6 Nm
- Fasten the clip that attaches the suction/liquid lines to the body near
the TXV.
- Connect the thermal beam electrical harness to the front body controller
module connector.
- Install the thermal beam electrical harness cover to the front body
controller module, and then install the bolt that attaches the cover to the
module.
.png) Torque 6 Nm
Torque 6 Nm
- Install the HVAC plenum outer duct to the HVAC plenum inner duct, and
then fasten the clips that attach the outer duct to the inner duct.
- Connect 12V power. See 12V Power (Disconnect and Connect).
- Install the underhood storage unit. See Underhood Storage Unit (Remove
and Replace).
READ NEXT:
Harness - Trunk- Remove
Remove
Remove the package tray trim. See Trim - Package Tray (Remove and
Install).
Disconnect the trunk electrical harness connectors.
Remove and discard the bo
SEE MORE:
Remove
Disconnect 12V power.
Remove the LH front door trim panel.
Remove the LH front door inner belt seal.
Remove the LH front door outer belt seal.
Remove the LH front window motor/regulator assembly.
Remove the LH door exterior release handle.
Remove the LH front door latch.
Remove
Remove
LH shown, RH similar
Open the trunk.
Release the clips (x2) that attach the ends of the trunk garnish to the
body.
Release the tabs (x10) that attach the trunk garnish to the body, and
then remove the trunk garnish from the vehicle.
Install
Installation procedure is the
 Harness - Trunk (Remove and Replace)
